 Awesome (work)week in Toronto without the lights, sights, Blue Jays, CN Tower or Timmies.
Toronto Workweek
Until last week I had only heard of the term “workweek” mentioned on multiple occasions in my short time at Mozilla. Last week from very early Monday (4:30 am) to late Friday (11:45 pm) I had my work week in Toronto. Workweeks are an opportunity to do some work on a project, collaborate with fellow Mozillians, checkout the local office if there is one but also to an extent enjoy the location where you are during that week.
Toronto was great, the little of it that I saw. I stayed in a hotel that was very centrally located in the Entertainment district; stayed in a room with a view of the CN Tower and the stadium next to it; it had great amenities and lots of food options nearby. This was great but nothing in my opinion compares to the results of a productive and successful workweek, one in which thanks to the invaluable help and guidance of my mentor there, allowed us to accomplish what we had set out to do.
We have a working extension! There’s plenty of work to be done on it as the timeline on my project nears (Aug. 14th) and there’s plenty of polishing and finishing touches needed but it works, it’s functional and does what it is supposed to do.
What’s Involved
Prior to heading into Toronto there was a functionality to the project that I was happy with. Scanning was occurring, results were printing out and a confidence percentage was available. I knew that I’d need to get that functionality on-demand by right clicking into the image but how to do that? A brief but not unrelated aside: one of the many take aways that I will have from working on this extension is how amazing a resource MDN is, how dependable it is for relevant information, details and its ease of use. The Context menu item is the feature needed to achieve on-demand right click functionality that provides a drop down menu to put the extension in use. This was great news to discover but using it meant several things needed to happen.
Tesseract was put to work in a background script since it would be doing long-term work, maintain long term state and load as soon as the extension is loaded and is enabled. With this change for tesseract, the manifest would need to be altered and permissions added for the background script. Additionally, because of the way the context menu feature works (now in the background script) the message (scanned results) and image information (srcUrl) needs to be moved out of the background script. Background scripts can not access webpages/DOM to which the message and srcUrl need to be passed to in order for them to be accessible to screen readers.
Background scripts may not have access to webpages but they can load content scripts and these do have access to webpages. Background and content scripts communicate to make the extension work. One (background) can access myriad web extension APIs necessary to get tesseract in motion and the other can access and modify web content, the end goal of the extension.
Last step of the process is enabling communication between those scripts. Communication is via a port suitable for long term communication as opposed a one time connection. Listeners are available in both scripts and through this port the background script sends the scanning results message and srcUrl to the content script which in turn currently passes the text into the image for screen reader access.
What’s next?
A lot has been accomplished but there’s still plenty of work to do. There are multiple Github issues to work through and many more to add. The extension now needs a name! We’ve decided that anything eagle, eagle eye related would be too boring and obvious. Most importantly the repo now needs to be moved into a Mozilla repo. Exciting stuff! I have one more week left in my project before the deadline. I’m really happy with what we’ve accomplished so far but I’m really excited to continue working on and improving this project and possibly working on others.
How It All Works
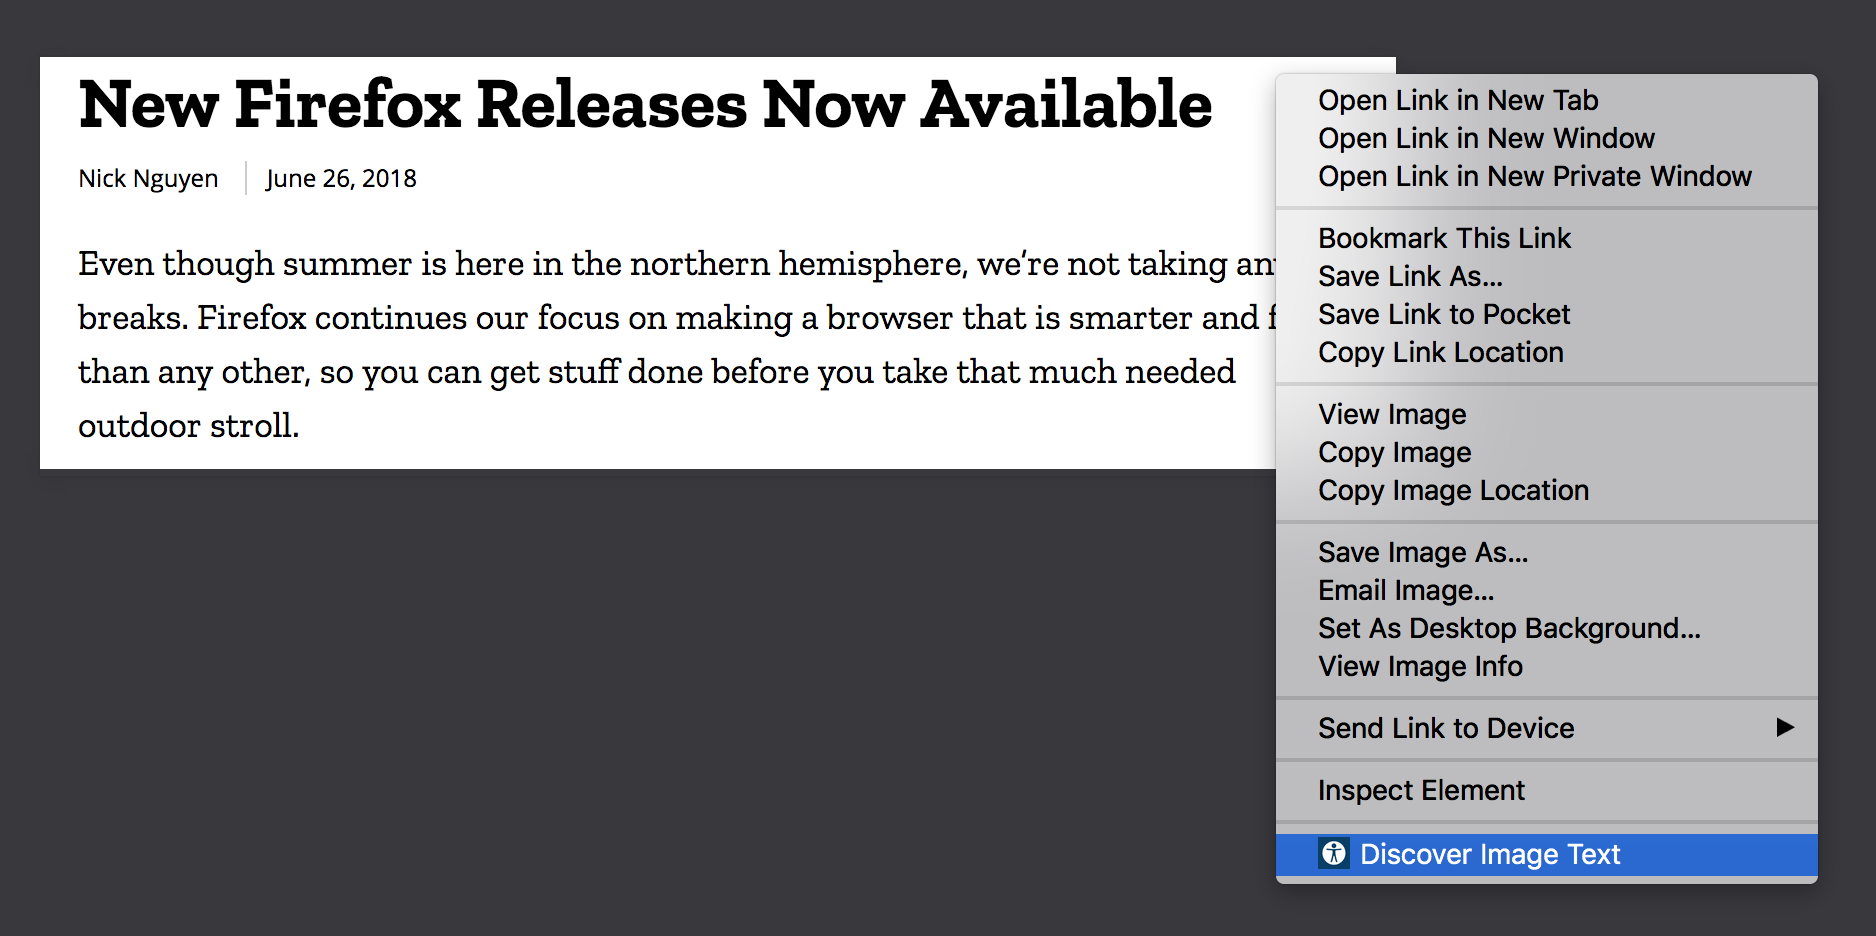 Once the extension is installed, right click on the image you want to scan. The Bubo Eye icon and “Discover Image Text” option will show at the bottom of the context menu.
 Prior to scanning and clicking “Discover Image Text” you can see the img alt attribute is empty. The attribute will be reassigned and scanned text will be injected there.
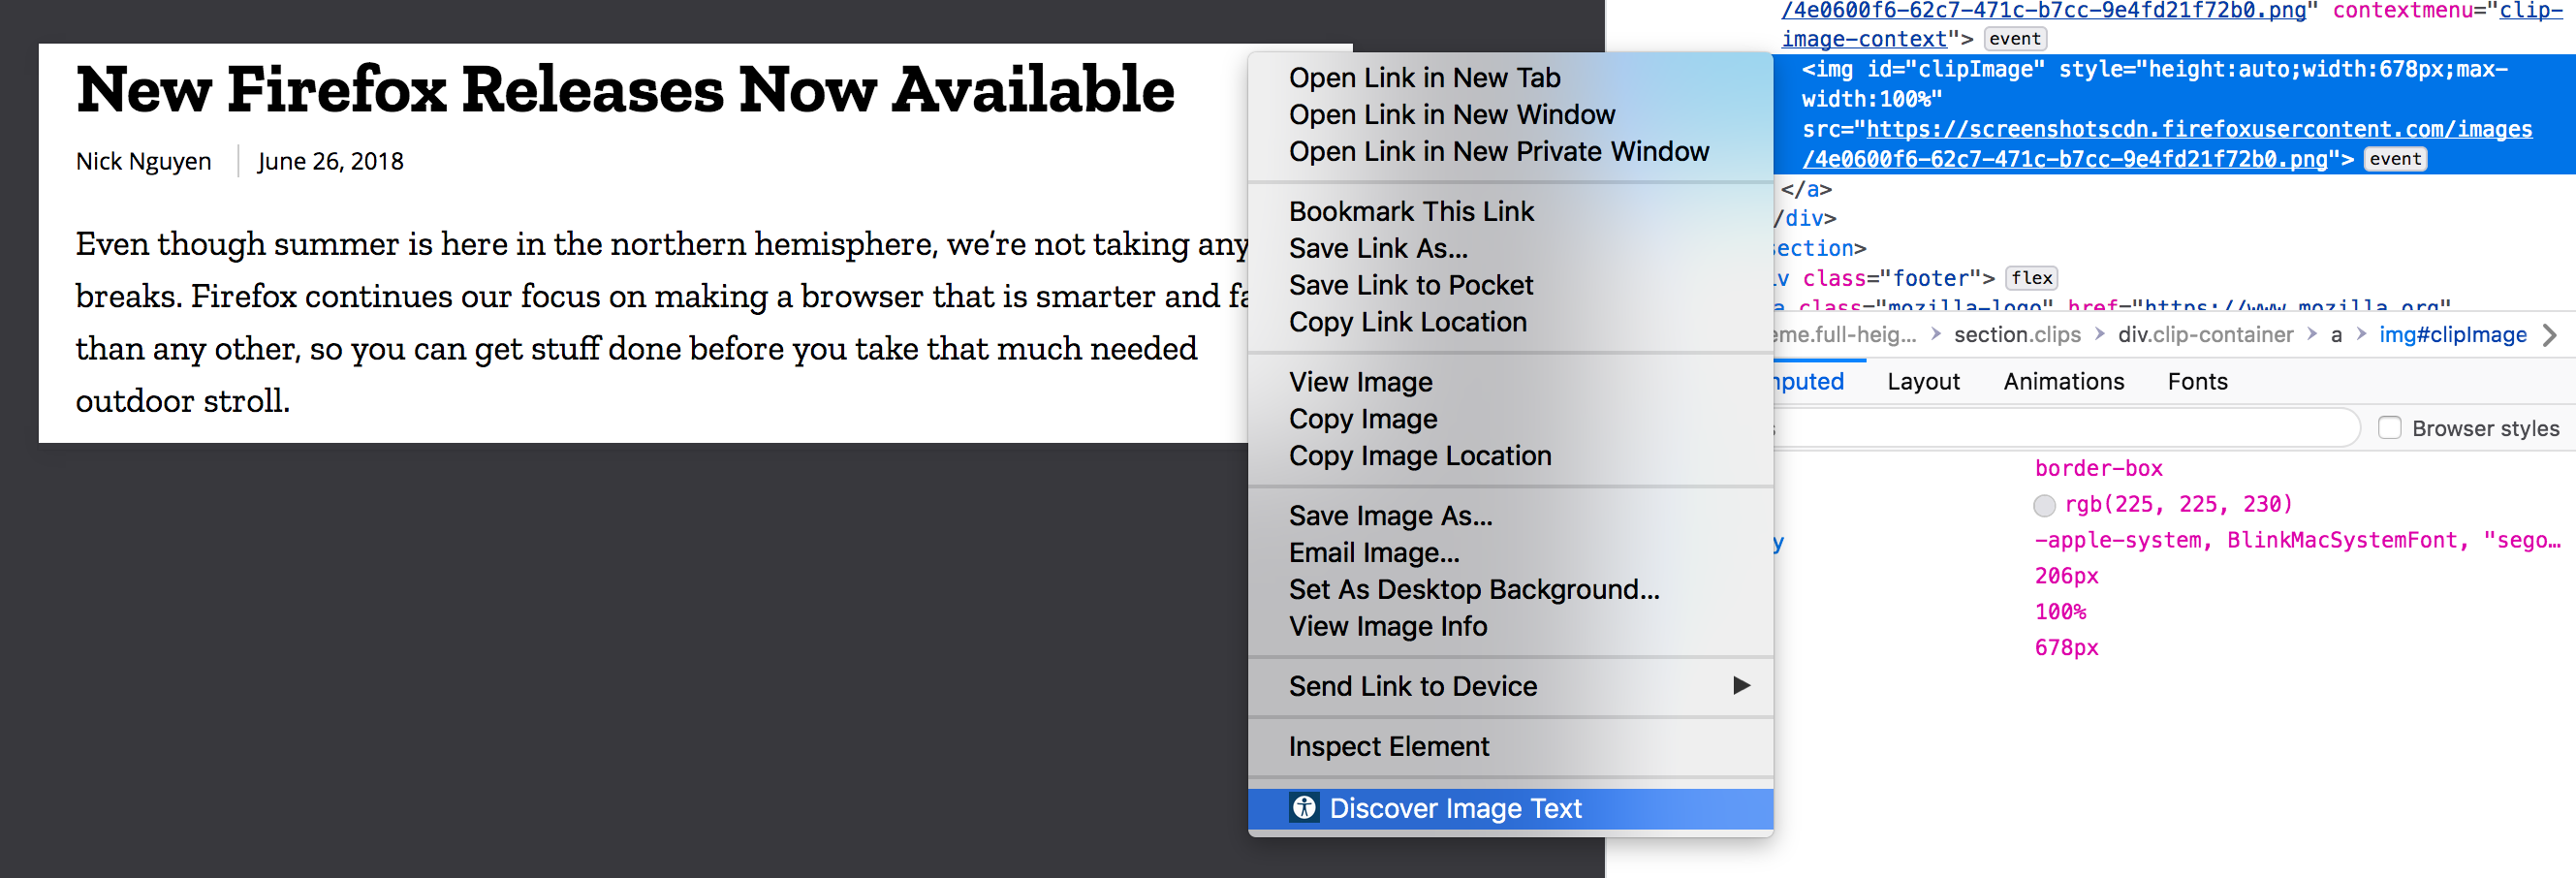 With inspector still open (which is not needed during regular use), alt attribute still empty, right click and “Discover Image Text”.
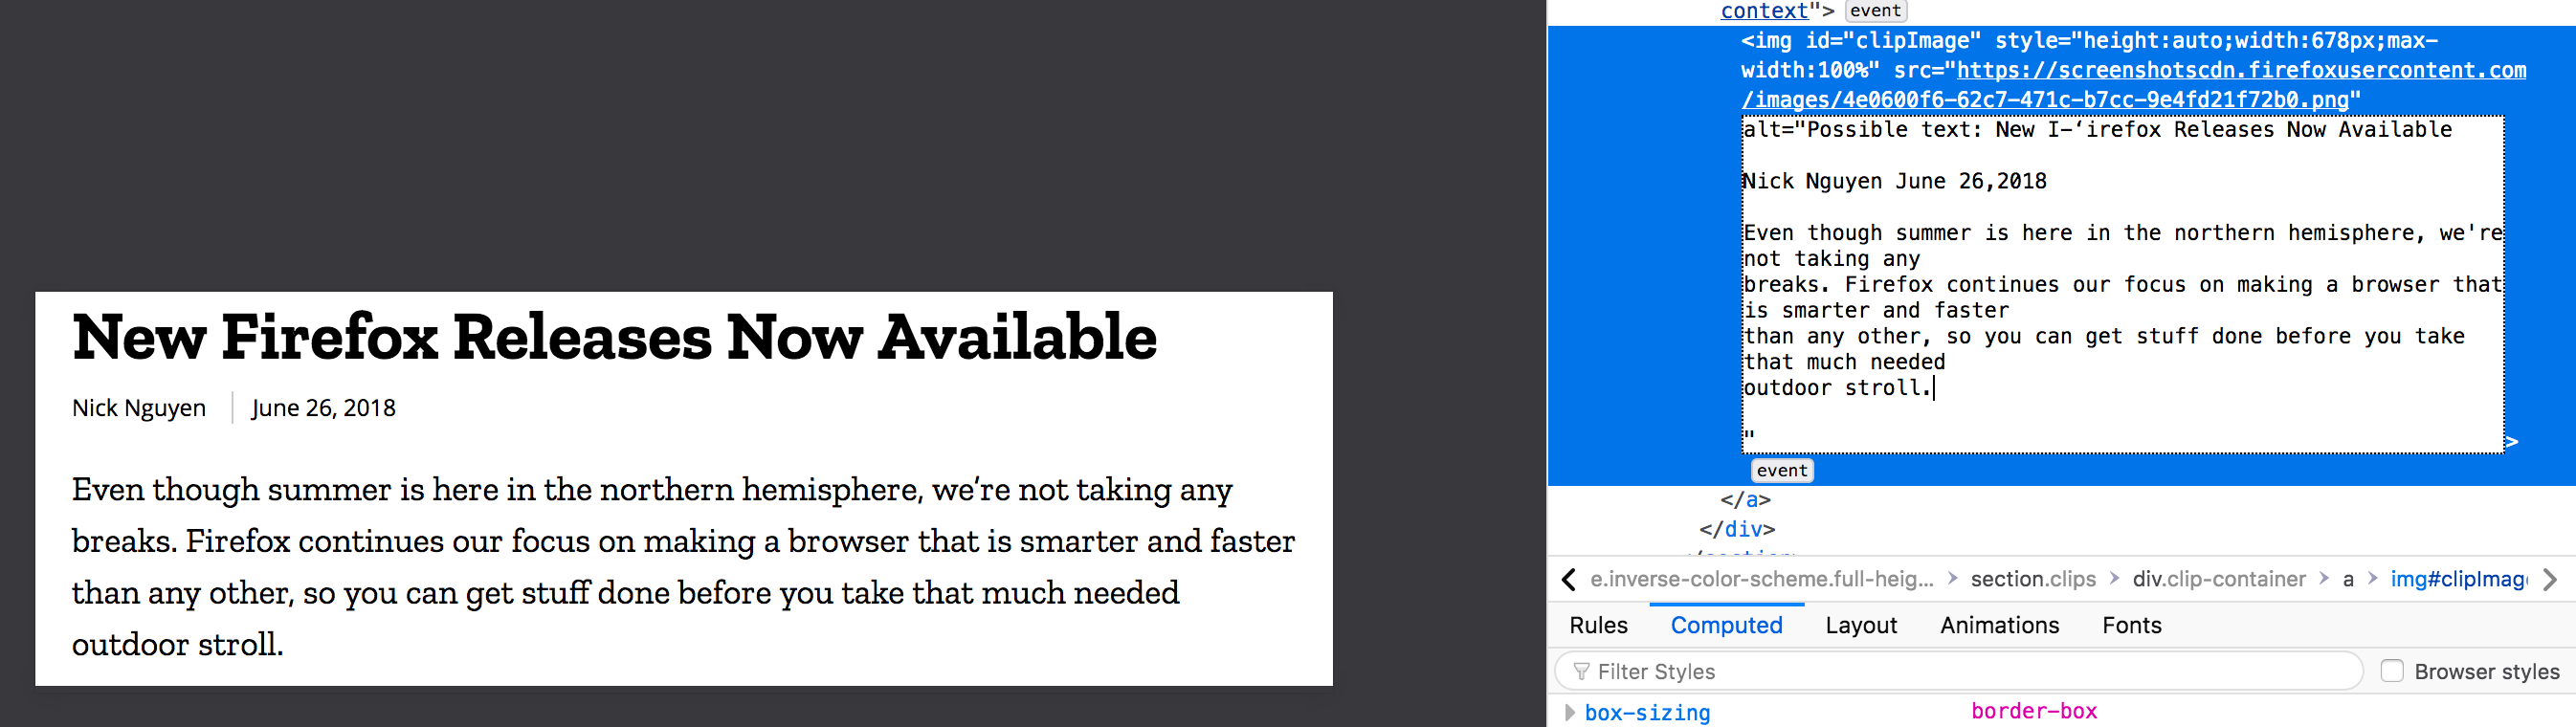 Image has been scanned and the alt attribute now has text from image. Alt attribute text always starts with “Possible text:” due to the potential inaccuracies mentioned above.